
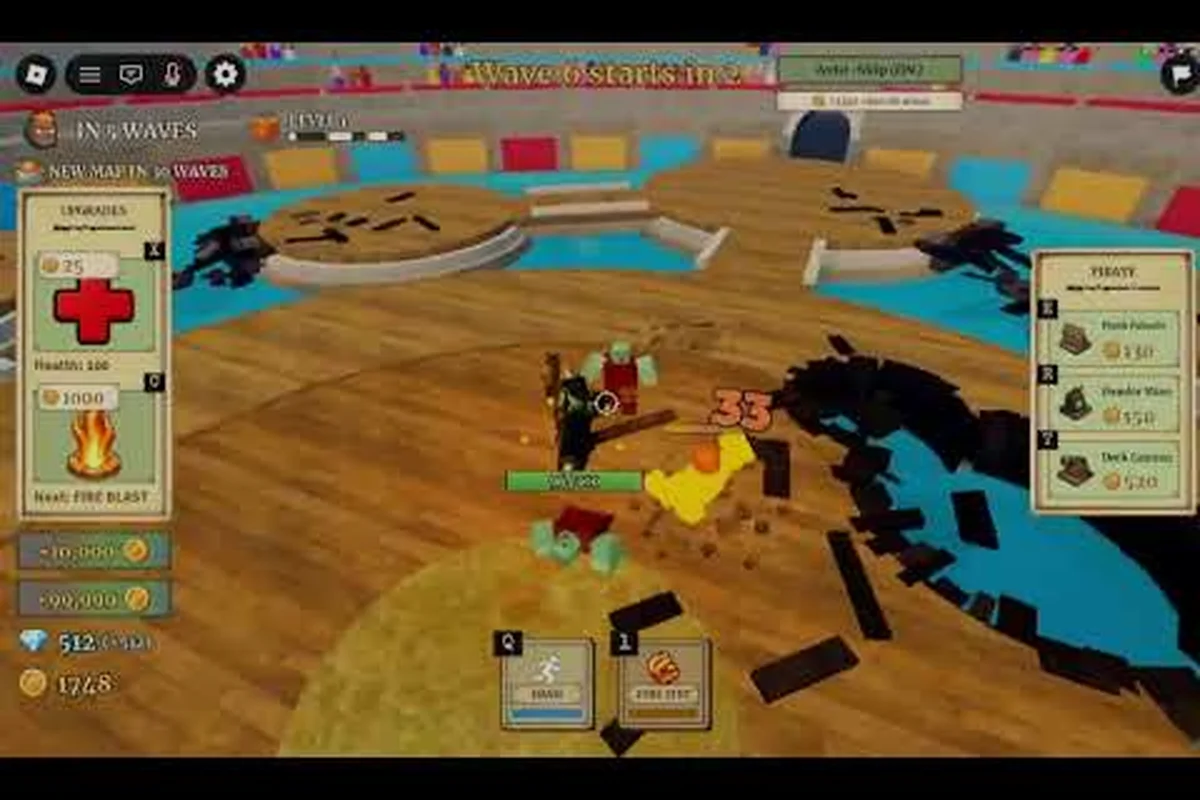
Dropping into Fruit Zombie Survival for the first time can feel like walking onto a One Piece set during a zombie outbreak, because twenty different Devil Fruits are flying around while endless waves close in. This Fruit Zombie Survival first run guide gives you a step-by-step path from lobby load-in through your first boss, so you stop feeding Berries to the horde and start building a real build.
Getting Set Up Before Your First Match
Before you queue up, take five minutes in the lobby. According to the official Fruit Zombie Survival game page, the Roblox title launched in August 2026, has already passed 1.74 million visits, and sits at roughly an 80 percent positive rating. That community size matters on day one, because it means matchmaking for the 4-player co-op mode is fast and you will rarely queue alone.
The game runs on keyboard and mouse by default, so use those quiet lobby minutes to actually press every key and feel where the sword swing, fruit toss, dodge roll, and map ping land on the bar. Default bindings typically cover movement on WASD, primary fire on left-click, the block ability on right-click, the interact key on E, and the respawn-call hotkey on Q, and remapping any of these before a wave starts saves you the awkward half-second fumble when a Bloater rushes your lane.
Keybindings You Must Memorize
| Action | Default Key | When You Use It |
|---|---|---|
| Basic Attack | Left Mouse | Spam during early waves |
| Devil Fruit Ability 1 | E | Your main damage button |
| Devil Fruit Ability 2 | V | Secondary burst or buff |
| Dash | Q | Escape boss telegraphs |
| Jump | Space | Reset aerial combos |
| Interact / Revive | F | Pick up Berries, revive teammates |
| Open Upgrade Menu | U or left-side panel | Spend Berries during wave countdown |
The Dash binding to Q is non-negotiable for new players, because every boss in the game telegraphs a one-shot stomp you can only avoid by sliding through the wind-up. If you only learn one binding on day one, make it Q, and bind it in a way that your left pinky can hit it without looking down.
Pre-Match Lobby Checklist
Use the pre-match countdown window methodically — start by tabbing through the UPGRADES menu so the Wave 5 free Health pickup binds to a muscle-memory key, then verify your starter fruit's cooldowns in the trial area, confirm party-size expectations with randoms via ping, and lower the One Piece-inspired soundtrack slider so the boss-stomp audio layer stays audible.
-
Pick a starter fruit: Bomb, Smoke, or Spring are the three most forgiving picks for new players. Bomb gives ranged splash, Smoke gives a disengage, and Spring gives a vertical escape that skips most early waves.
-
Check the party size: If you queue solo, the game fills the other three slots with randoms. If you queue with friends, set the difficulty expectation before Wave 1.
-
Bind your upgrades hotkey: Open the left-side UPGRADES menu once so you know the exact key path during the Wave 5 countdown, when you get a free Health pickup.
-
Mute background music if you need audio cues: Boss stomps and special zombie spawns have a distinct sound layer that gets buried under the One Piece-inspired soundtrack at higher volume.
How Waves, Berries, and Diamonds Actually Work
Fruit Zombie Survival has three overlapping currencies, and confusing them is the fastest way to brick a first run. Players who finish their first session with thousands of Berries and zero Diamonds usually misread which one is permanent, which is a mistake this Fruit Zombie Survival survival guide is designed to head off.
The Three Currencies at a Glance
| Currency | Earned From | Lost On Death? | What It Buys |
|---|---|---|---|
| Berries | Killing zombies, clearing waves | Yes, fully | Mid-run upgrades (Health, Damage, Cooldown) |
| Diamonds | Completing waves, boss kills, diamond farm loops | No, persists | Permanent upgrades across characters |
| Robux / R$ | Real money or game pass | N/A | Revives, cosmetics, extra fruit slots |
Berries are your in-match oxygen, and the diamond farm guide from All Things How shows the Corrida Colosseum solo loop sustaining roughly 19,000 Diamonds per hour at about a minute per run, paying around 320 Diamonds each time. That speed is meaningless if you cannot survive Wave 1 in a real match, which is why the early game is all about spending Berries correctly before Diamonds even enter the conversation.
Reading Wave Difficulty
Wave difficulty in Fruit Zombie Survival ramps on a roughly exponential curve that the community has mapped by averaging hundreds of run logs, with zombie HP, attack damage, and spawn density each multiplying by a different factor per wave rather than scaling uniformly. The net effect is that a single Trash zombie at Wave 1 may deal 5 damage, but by Wave 10 the same zombie variant hits for around 40, while elite and boss HP pools inflate even faster, which is exactly why the Wave 10 Dune Marauder acts as the natural skill-check ceiling for new players.
-
Waves 1-4: Trash zombies, one-shot kills, perfect for farming Berries and learning your fruit's range
-
Wave 5: First mini-boss spawns, free Health upgrade appears during the countdown
-
Wave 10: Dune Marauder boss, the natural end of a beginner run
-
Waves 11-20: Mixed horde plus elite zombies, recommended only with a coordinated 4-stack
-
Wave 20+: Endless scaling, leaderboard territory, expect 1-shot kills from off-screen zombies
If you only ever play to Wave 10 in your first three runs, you are playing the game the way it was designed to be played. Treating the boss timer as a finish line, not a checkpoint, removes a huge amount of new-player anxiety and lets you spend mental energy on positioning instead of survival math.
Controls Guide: Surviving the First Five Waves
This Fruit Zombie Survival controls guide is not about memorizing every binding. It is about building a small set of habits you can repeat under panic. The reason most new players die on Wave 3 is not low damage, it is panic-strafing into a wall, losing their cursor, and eating three zombie hits before they can reorient.
The Core Movement Loop
-
WASD for ground movement, always face the cursor so your left-click hits whatever is under it
-
Q (Dash) has a short cooldown, so save it for boss telegraphs and the moment a zombie touches your back
-
Space lets you reset your combo string against grouped zombies, which is useful when a Bomb ability would friendly-fire your team
-
Hold Shift (if bound) to walk, which is the difference between pulling a stray zombie into your team and keeping your line clean
| Mistake | What Happens | Fix |
|---|---|---|
| Holding left-click while retreating | You walk backward into a zombie behind you | Release click, face the threat, then re-engage |
| Spamming E off cooldown | You sit in the recovery frames while a zombie hits you | Wait for the orange flash to clear before re-casting |
| Not dashing through boss stomp | One-shot death on Wave 5+ | Dash through the wind-up, not away from the boss |
| Buying the wrong mid-run upgrade | You run out of damage before Wave 10 | Prioritize Damage first, then Health, then Cooldown |
The single biggest new-player upgrade trap is buying Cooldown Reduction before Damage. Cooldown only helps if you are alive long enough to cast a second time, and a flat Damage boost lets you delete zombies before they reach you. Treat your first 200 Berries as a Damage investment, your next 300 as Health, and only then start trimming cooldowns.
Mid-Run Upgrade Priority
| Priority | Upgrade | Why It Matters Early |
|---|---|---|
| 1 | Damage | Clears Wave 5 mini-boss in 30 seconds instead of 2 minutes |
| 2 | Health | Survives one extra mistake per wave |
| 3 | Cooldown Reduction | Lets you chain E + V combos during boss enrage |
| 4 | Area / Projectile Size | Quality-of-life, skip until Diamond-funded |
Picking Your First Devil Fruit
Picking a fruit in the lobby is the most consequential decision of any Fruit Zombie Survival first run guide, because your fruit defines your role in a 4-stack. There is no universally best fruit, but there are three that smooth out the learning curve dramatically for players who have never touched a Roblox wave survival game before.
Beginner-Friendly Fruit Comparison
| Fruit | Role | Difficulty | Best For |
|---|---|---|---|
| Bomb | Ranged burst | Easy | Solo players who want to kite from range |
| Smoke | Disengage / scout | Easy | Players who panic easily and need an escape |
| Spring | Vertical mobility | Easy | Players who want to skip waves by platforming |
| Fire Fist | Mid-range DPS | Medium | Players who read the All Things How diamond farm loop |
| Rubber | Tank / counter | Hard | Veterans who know boss patterns already |
Bomb is the safest first pick because its E ability is a projectile that explodes on impact, letting you deal damage without standing in melee range. Smoke is the most forgiving for new players because its V ability drops a cloud that staggers zombies, buying you two full seconds to reposition. Spring is the most fun for platformers because its E launches you skyward and lets you perch on map geometry that zombies cannot path to, which is a cheap but effective way to cheese Wave 4 if your team is struggling.
If you want a deeper breakdown of how these fruits perform in the late game against elite zombies, the Fruit Zombie Survival wave survival guide maps each fruit's damage profile against every major zombie archetype, which is the natural next read after this first run guide.
Your First Run: A Step-by-Step Walkthrough
The first run of any Roblox wave survival game follows a predictable rhythm, and Fruit Zombie Survival is no exception. What follows is a turn-by-turn script for Waves 1 through 10 that you can follow on your very first match, then forget as you build your own rhythm.
Waves 1-4: The Berries Phase
-
Spawn in, immediately face the cursor toward the open lane, and fire your E ability at the first zombie group to start your combo timer.
-
Spend the first 30 seconds learning the map layout, because every map in the game has a chokepoint that funnels zombies into a kill lane.
-
During the Wave 3 countdown, open the UPGRADES menu and buy your first Damage point.
-
Do not chase zombies into the fog, because off-screen spawns can grab you before you see them.
Waves 5-7: The Mini-Boss Phase
-
The mini-boss spawns at the center ring, marked by a glowing pulse on the ground.
-
The boss has three attacks: a frontal swipe, a ground stomp, and a charge. All three are dodged by Q-dashing through the wind-up, not away from it.
-
Save your V ability for the moment the boss raises its arms for the stomp, because the burst damage window is shorter than it looks.
-
After the boss dies, immediately grab the free Health upgrade from the left-side panel during the wave transition.
Waves 8-10: The Dune Marauder Phase
-
Dune Marauder is the real first-run gatekeeper, and it appears on Wave 10 with a sandstorm AoE that ticks damage.
-
Stay on the perimeter of the arena and kite the boss in a wide circle, because the sandstorm is centered on the boss model and follows it.
-
During the enrage phase at roughly 30 percent HP, the boss gains a charge attack that crosses the entire arena, so save your Q (Dash) for that specific move.
-
The boss drops a large Berries pile on death, plus a guaranteed Diamond payout. Grab everything in a 10-meter radius before the next wave starts.
If you want a deeper dive into the late-game strategies that kick in after this first run, the Fruit Zombie Survival how to survive longer guide covers loadouts, wave 20 survival, and boss-specific counters that build on the foundation you set in runs 1 through 3.
Frequently Asked Questions
What is the best fruit for a first run in Fruit Zombie Survival?
Bomb is the best first-run fruit because its ranged explosion lets you deal damage without standing in melee, which is the most common way new players die. If you panic easily, pick Smoke for its disengage cloud. Both options clear the Wave 10 boss in under two minutes once you learn the timing.
How do I get Diamonds fast as a beginner?
Run the Corrida Colosseum solo loop documented by All Things How: set the party size to 1, toggle Auto-Skip in the top-right corner, spam the Fire Fist V ability, buy Health during the wave countdown, and reset right after the Dune Marauder dies on Wave 10. Each loop pays about 320 Diamonds in roughly a minute, sustaining around 19,000 Diamonds per hour.
Are there any working codes for Fruit Zombie Survival?
According to Pro Game Guides, the developer has not yet launched a codes system, so there are no working codes to redeem as of September 2026. Watch the official Discord for announcements if a code system drops in a future patch.
What should I spend my first permanent Diamonds on?
Prioritize the permanent Damage unlock first, because it carries across every run and every fruit. Health is a close second, and Cooldown Reduction is third. Skip cosmetic fruits and extra slots until you have a Damage and Health foundation, or you will hit a hard wall around Wave 15.
Can I play Fruit Zombie Survival solo, or do I need a team?
You can play solo, and the Corrida Colosseum diamond farm loop is built for solo play, but the standard wave survival mode is significantly easier with a coordinated 4-stack. The matchmaking system fills your party quickly, so you rarely wait more than a minute, which makes solo queueing a perfectly viable first-run experience.