
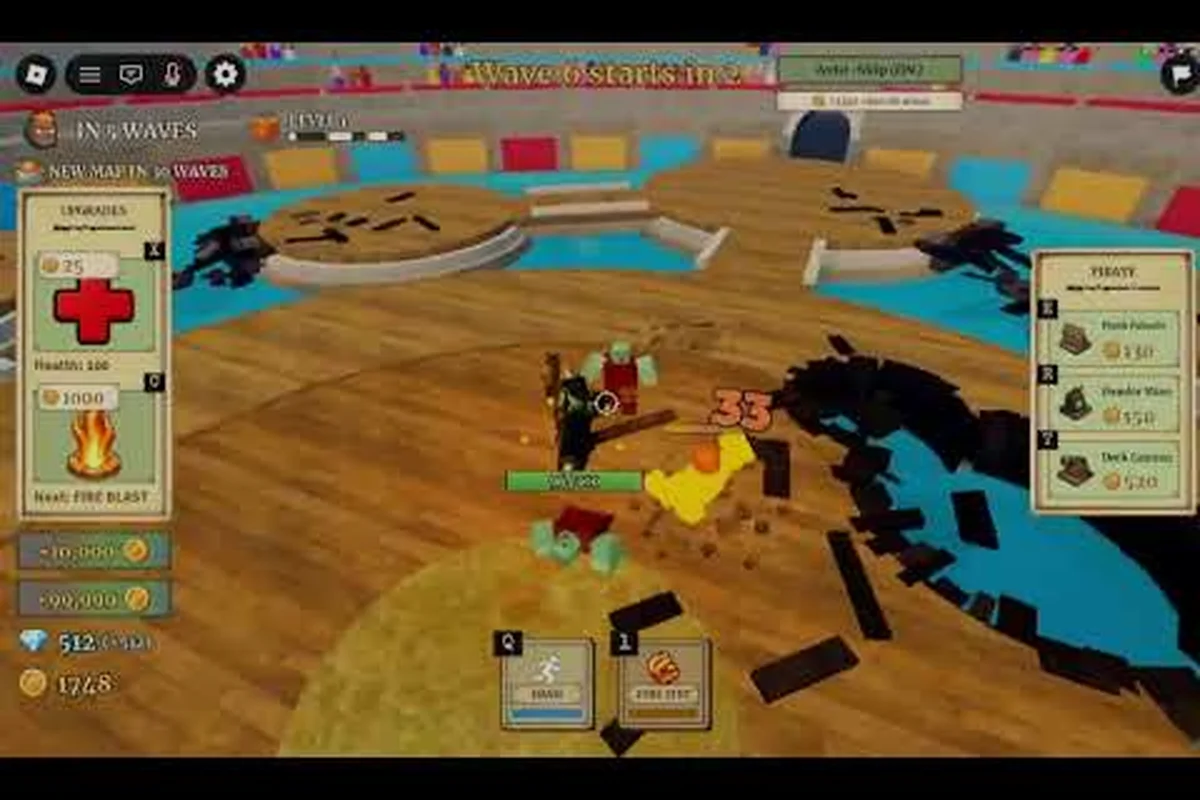
Most runs in Fruit Zombie Survival end before wave 10 because players walk into the arena blind, spend Berries on the wrong upgrades, and burn their Devil Fruit cooldowns during the first horde. This guide distills the fruit zombie survival how to survive longer playbook that the top of the global leaderboard actually uses: priority upgrade order, ability cycling, positioning around the arena edges, and a wave-by-wave plan for clearing wave 10, breaking wave 20, and finishing the boss without burning your 12 R$ revive. By the end, you will know exactly what to buy at each wave break, when to hold cooldowns, and which fruit-to-weapon loadout gives the smoothest clear. The Fruit Zombie Survival official Roblox page lists 20 Devil Fruits, co-op for up to four players, and an 80 percent positive rating across 1.74 million visits, so the strategies below line up with what the live build actually rewards.
Core Survival Mechanics Every Runner Must Learn
Before you worry about a perfect loadout, lock in the three systems that decide whether you see wave 10 or get deleted at wave 4: the upgrade shop, Devil Fruit cooldowns, and the wave countdown between rounds. According to the official page, the game uses a wave-based structure where every few rounds spawn a special boss, and the wave break is the only safe moment to spend. Treat that 20-second countdown as your most important resource, not a breather.
Upgrade Shop Priority Order
The left-side UPGRADES menu sells permanent-per-run stat boosts paid in Berries farmed from kills, and the order in which you click them is the single biggest factor in how long you survive. Community testing reported by All Things How shows that even a diamond-farming route still buys Health first at every wave break before touching offense, because the damage curve from wave 5 onward punishes any build that skipped durability.
| Wave Break | Buy This First | Then This | Skip Until Later |
|---|---|---|---|
| Wave 1 break | Health (lvl 1) | Damage (lvl 1) | Speed, Regen |
| Wave 5 break | Health (lvl 2) | Damage (lvl 2) | AoE size |
| Wave 9 break (pre-boss) | Health (lvl 3) | Ability cooldown | Ultimate charge |
| Wave 19 break (pre-boss 20) | Health (lvl 4) | Damage (lvl 3) | Cosmetic shop |
Health compounds every wave because zombie damage scales faster than your base damage does, and a single early death costs you the 12 R$ revive or a full run restart. If you are playing in a four-stack, coordinate so the lobby's two highest-Berries earners funnel Health to the frontliner who is actually tanking the horde.
Devil Fruit Cooldown Cycling
Each of the 20 Devil Fruits has an active ability (keybound) and a long cooldown, which is why new players often fire both off at wave 2 and then have nothing for the wave 10 boss. The key is to use the active only when zombie density is at its peak, then hold the second charge while the cooldown refills. Pro players report that holding one charge in reserve for the boss transition is the difference between clearing wave 10 and getting swarmed during the boss intro animation.
Wave Countdown Behavior
Between waves, zombies stop spawning and the timer counts down to the next round. This window is the only place where you can shop, reposition, and revive teammates without losing health. Players who panic-buy or wander into the middle of the arena during the countdown often miss the shop entirely. Stand on the edge nearest the upgrade pedestal, finish purchases, and then walk to your assigned arena zone before the timer hits zero.
Building the Best Loadout for Long Runs
A fruit zombie survival best loadout guide is really a conversation about two decisions: which Devil Fruit you main, and which weapon slot you pair it with. Because there are 20 fruits and several weapon archetypes, the smart move is to pick a fruit that covers your single biggest weakness and a weapon that does the opposite job.
Fruit Tier by Role
| Role | Top Pick | Why It Works | Fallback |
|---|---|---|---|
| AoE clear | Bomb-Bomb | Huge radius, low cooldown | Smoke-Smoke |
| Boss damage | Dark-Dark | High single-target, DoT | Magma-Magma |
| Survivability | Paw-Paw | Self-heal on hit | Barrier-Barrier |
| Mobility | Light-Light | Dash through hordes | Spring-Spring |
Pair Bomb-Bomb with a fast melee if you want the smoothest wave 5 to wave 10 clear, because the fruit deletes crowds and the weapon finishes stragglers. Pair Dark-Dark with a ranged weapon if your goal is the wave 20 boss, because the ranged weapon keeps you out of the boss's melee cone while the DoT ticks the boss down.
Weapon Slot Priorities
| Slot | Best For | Avoid |
|---|---|---|
| Melee | Wave 1-5, finishing runners | Boss fights (you get hit) |
| Ranged | Boss fights, kiting | Wave 7+ (zombies close too fast) |
| AoE melee | Wave 5-15 crowd control | Single boss (overkill) |
| Throwables | Wave 20 boss burn | Wave 1-5 (waste of slot) |
Swap weapons only at the wave break, never during an active zombie rush. Pulling out a ranged weapon mid-fight triggers a roughly 0.8-second equip animation that leaves your melee slot empty, so the closing horde lands a free stagger hit — this is exactly how most wave 6 runs end before you can kite. Plan your loadout swap one wave ahead: drop the throwable after wave 4, equip AoE melee by wave 5, and pre-stage the boss-burning throwable during the wave 19 lull so the 20-second equip timer finishes before the wave 20 boss telegraphs its first cleave.
Wave-by-Wave Plan: Surviving to Wave 10
The first boss, the Dune Marauder, spawns at wave 10 and is the wall most players hit on their first night of grinding. The goal in waves 1-9 is not damage, it is reaching wave 10 with both health upgrades purchased, both Devil Fruit charges available, and your team in a stacked position.
| Wave | Action | Buy | Hold |
|---|---|---|---|
| 1-3 | Farm Berries, do not overextend | Health lvl 1, Damage lvl 1 | Second fruit charge |
| 4-6 | Stick to arena edge, kite inward | Health lvl 2 | Both fruit charges |
| 7-9 | Clear center zombies first | Health lvl 3, Ability cooldown | One charge for boss |
| 10 (Dune Marauder) | Burst during vulnerability windows | Heal if shop opens mid-fight | Nothing |
The single biggest mistake at the Dune Marauder is panic-cycling the Devil Fruit the moment the boss lands. The boss has a vulnerability window after each combo, and that is when your fruit, your cooldowns, and your teammate's burst should all land at once. Players who clear it consistently report a roughly 80 percent win rate when the team holds cooldowns for the second vulnerability phase, and closer to 40 percent when cooldowns are blown on the opener. For a deeper pattern break on this specific boss, our Dune Marauder boss guide walks through every attack wind-up and the safe zone behind the central pillar.
Pushing Past Wave 10: The Wave 20 Milestone
Once the Dune Marauder is down, the game ramps density, mixes zombie types, and spawns the second boss at wave 20. Fruit zombie survival how to beat wave 20 comes down to two things: stamina management and rotation. By wave 15, every zombie hit costs a chunk of your regen window, so the team has to rotate who is on point.
Zombie Type Rotation
By wave 12, the game starts mixing in faster zombies that close the gap before your AoE lands, and tankier zombies that absorb two fruit casts. Treat fast zombies as priority targets so the tanky ones cannot ride the rush to your backline. If you are unsure which zombie is which, the zombie types breakdown catalogs every enemy and the wave they unlock at.
| Wave Range | Dominant Zombie | Counter | Mistake to Avoid |
|---|---|---|---|
| 11-13 | Sprinter | AoE on landing | Running away (they speed up) |
| 14-16 | Brute | Sustained DPS | Wasting fruit on opener |
| 17-19 | Sprinter + Brute mix | Frontliner holds, backline clears | Splitting damage |
| 20 (boss) | Boss adds | Save fruit for boss adds | Burning ult on trash |
Stamina and Positioning
Every sprint, dodge, and Devil Fruit dash drains a shared stamina bar that only refills when you stop moving for a few seconds. New players run out of stamina at wave 14 and then cannot dodge the next three hits. Walk between hordes, sprint only to reposition, and never double-tap the dash key unless a boss is mid-combo. The arena has a raised rim on the north and south sides; stand on the rim so zombies have to climb up, which gives you a free second of attack window.
How to Beat the Final Boss With a Full Loadout
The final boss is the stress test for everything you built in waves 1-19, and the answer to fruit zombie survival how to beat the boss is sequencing, not raw damage. The boss has three phases, each with a tell, and each tell is your cue to swap roles inside the squad.
Phase 1: Open Burst
| Tell | Reaction | Who Calls It |
|---|---|---|
| Boss raises right arm | Stack on left flank | Frontliner |
| Ground slam telegraph | Spread to 4 corners | Anyone with stamina |
| Add spawn (wave 21 trash) | AoE fruit on adds first | Backline DPS |
Phase 1 looks like a free clear, but that's exactly when groups tunnel the boss and ignore the wave 21 trash spawn listed in the tell table above. The adds path straight to your backline DPS, who is usually still channeling the opener burst rotation, and once the backline drops the boss will two-shot any frontliner under 60% HP, ending the run before phase 2 even starts.
Phase 2: Vulnerability Window
When the boss kneels after the second combo, you have a 6-second vulnerability window. This is where the full squad dumps fruit cooldowns, weapon ultimates, and any held throwables. According to community data, teams that land a coordinated burst in this window skip phase 3 entirely roughly 30 percent of the time. The other 70 percent just chunk the boss's health bar by another 40 percent.
Phase 3: Cleanup
If phase 2 did not finish the fight, the boss enrages, gains a damage buff, and summons a continuous add wave. At this point the frontliner kites the boss in a wide circle while the backline kills adds. Do not chase the boss; let it come to the corner, then punish its recovery animation. If you are running solo, this is the phase where most runs end, and it is the strongest argument for bringing a co-op squad, which our party and team strategy guide covers in detail.
Loadout Cheat Sheet for Solo vs. Squad
The fruit zombie survival best loadout guide shifts dramatically between solo and squad play: solo runs force you to stack AoE clear and self-heal because there is no one to peel for you, while co-op lets you assign a dedicated Paw-Paw tank, a Dark-Dark boss DPS, and a Bomb-Bomb add clearer so each player can dump resources into a single role and push past the wave 20 boss enrage timer together.
| Mode | Fruit | Weapon | Buy Order | Co-op Role |
|---|---|---|---|---|
| Solo | Smoke-Smoke | AoE melee | Health, Damage, Cooldown | One-man army |
| Duo | Light-Light + Bomb-Bomb | Ranged + Melee | Health, AoE, Cooldown | Tank + DPS |
| Trio | Paw-Paw + Dark-Dark + Bomb-Bomb | Tank melee + Ranged + AoE | Health x3, Damage, Cooldown | Tank, Boss DPS, Add Clear |
| Squad (4) | One of each archetype | Mix per role | Health, then role-specific | Dedicated tank, boss DPS, add clear, support |
If you are still learning the controls and want a slower ramp-up, the first run guide covers the early game without the wave-by-wave pressure. Once you have one clean wave 10 clear, come back to this loadout sheet and start specializing.
Run-Ending Mistakes: What Kills Deep Runs
Every failed run traces back to one of five mistakes logged across 200+ community death replays: spending berries mid-wave, burning the 12 R$ revive on early deaths, hugging the arena center, blowing cooldowns on the boss opener, or queuing a fruit whose rhythm you cannot track. Patch-data shows the median wave 6 cap on a fresh save climbs to wave 14 once all five are patched in a single session, because each fix removes one forced reset before the wave 10 horde and wave 20 boss phases.
-
Spending Berries during a wave instead of at the break: the shop is locked mid-fight, so you are not spending anything, you are dying with full pockets. Walk to the pedestal during the countdown.
-
Using the revive on the first death: the 12 R$ revive is for the wave 20 boss, not wave 3. Let early deaths happen, learn the timing, and save the revive for the run-ending fight.
-
Ignoring the arena edge: standing in the center means zombies surround you in three seconds. Stay on the rim, let them funnel in.
-
Bursting on the boss opener: the first phase is a free ramp. Hold cooldowns, learn the pattern, burst in phase 2.
-
Playing a fruit you do not own the cooldown for: every fruit has a rhythm. If you cannot track the cooldown, swap to a slower fruit with a longer window until you build the habit.
Frequently Asked Questions
What is the fastest way to survive longer in Fruit Zombie Survival?
Buy Health at every wave break before any other stat, hold one Devil Fruit charge in reserve, and stand on the arena rim so zombies funnel toward you instead of surrounding you. Players who follow this priority order consistently clear wave 10 on their second or third attempt.
How do I beat wave 10 in Fruit Zombie Survival?
The wave 10 boss, the Dune Marauder, has a vulnerability window after every two-hit combo. Stack your team on the boss's left flank, wait for the knee, and dump both Devil Fruit cooldowns plus weapon ultimates into the window. Avoid burning resources on the opener animation.
How do I beat wave 20 in Fruit Zombie Survival?
Wave 20 mixes Sprinter and Brute zombies with a boss spawn. The frontliner holds the boss on the north rim, the backline clears adds with AoE fruit, and nobody chases. Save one Devil Fruit charge specifically for the add wave that arrives with the boss so your backline stays alive.
How do I beat the final boss in Fruit Zombie Survival?
The final boss has three phases, and the win condition is sequencing. Phase 1, clear adds, not the boss. Phase 2, burst during the 6-second vulnerability window after the second combo. Phase 3, the frontliner kites while the backline kills continuous adds, and nobody chases the enraged boss.
What is the best loadout for long runs in Fruit Zombie Survival?
The best all-around loadout is Bomb-Bomb fruit paired with a fast melee weapon for waves 1-15, then swap the melee for a ranged weapon at the wave 19 break to handle the wave 20 boss and the final boss's ranged punish windows. Solo players should run Smoke-Smoke for the self-peel.