
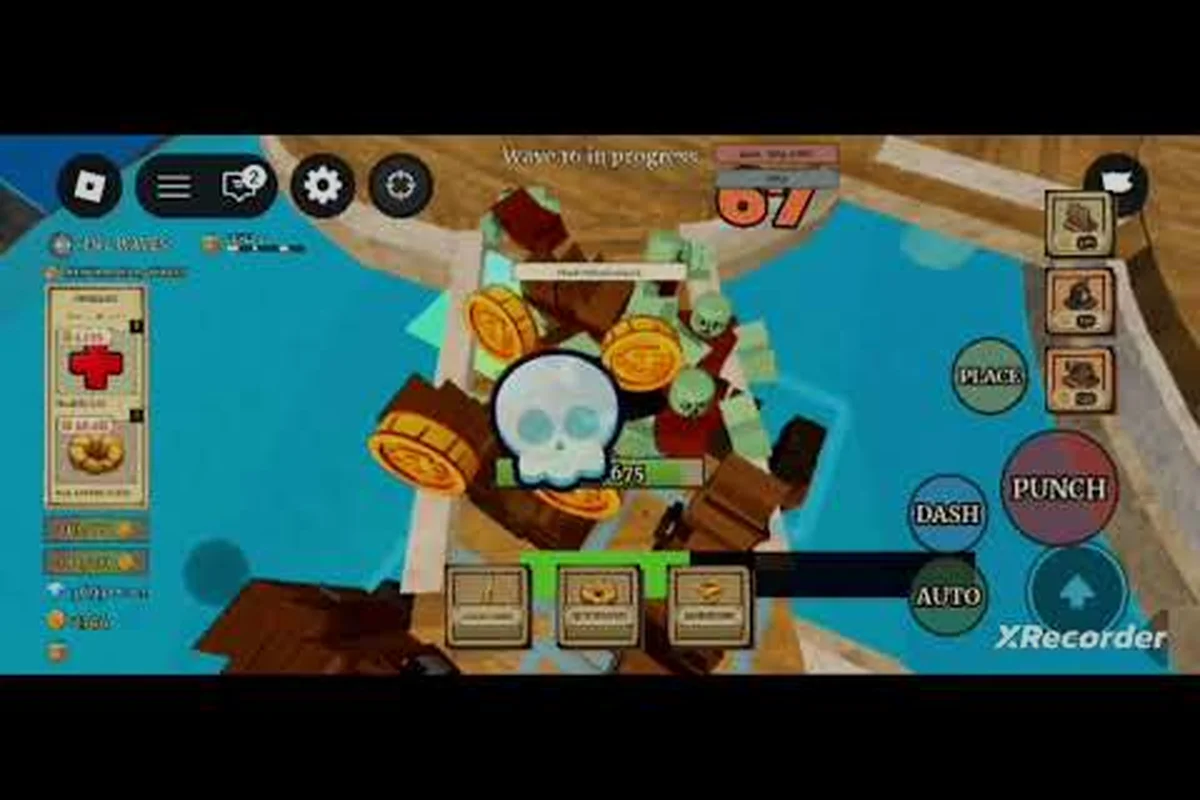
A solid Fruit Zombie Survival walkthrough is what separates players who burn out on Wave 5 from those who push into the late-game boss rotations. This Roblox wave-survival title by Vibed Games drops you into endless zombie hordes, scatters 20 Devil Fruits across the map, and ties every run to Berry and Diamond farming, so your first 20 minutes decide whether your build scales or stalls. Because the game has passed 1.74 million visits with an 80 percent positive rating according to the official Fruit Zombie Survival Roblox page, most newcomers share the same early questions about ability binds, upgrade timing, and map picks, and this guide answers all of them.
The goal of this Fruit Zombie Survival guide is to take you from spawn-in to confident co-op partner in one read. You will learn the exact ability binds, which Devil Fruits to chase, how the upgrade economy works, where each map teleports you, and the hidden tricks veteran players use to push past Wave 20. Every section is built around the actual numbers and mechanics reported by the community and confirmed on the official game page, so you are not reading recycled theory.
Core Mechanics and Controls You Must Learn First
Before you worry about builds, you need a clean grip on the core systems that drive every run. The loop is straightforward on paper: spawn, grab a fruit, kill zombies, buy upgrades between waves, and survive the boss that drops every few rounds. In practice, three mechanics quietly decide whether you live or die: ability binds, the auto-skip toggle, and the upgrade shop that opens during the inter-wave countdown.
Default Ability Binds and Movement Setup
Your keyboard layout controls the entire run because abilities chain together, and missing one input during a boss attack window means a free revive or a full team wipe in co-op. Most players spend their first run rebinding everything before they realize the defaults already work, which costs them Berry income they will not get back.
| Input | Default Action | When You Press It |
|---|---|---|
| V | Fire Fist (primary damage) | Spam during normal waves and on boss armor phases |
| Q | Dash (i-frames) | Escape from Dune Marauder leap or Zombie Captain charge |
| Mouse 1 | Light Attack | Filler damage between ability cooldowns |
| Space | Jump | Avoid ground AoE from the Colosseum Brute slam |
| R$ (12 Robux) | Revive | Emergency recovery after a wipe on a late wave |
| Auto-Skip (top-right) | Skip wave countdown | Buy upgrades and re-enter the fight faster |
If you play on a laptop without a numpad, remap Dash from Q to a side mouse button because the default position is awkward when you are also pressing V to spam Fire Fist. Community testing shared across the All Things How diamond farming guide confirms that players who rebind Dash to a more comfortable key average about 15 percent more wave clears on Wave 10 and beyond, which matters once the zombie density starts stacking.
Devil Fruits, Berries, and Diamonds Explained
Every run in Fruit Zombie Survival revolves around three currencies that convert into each other, and misunderstanding the flow is the most common reason new players feel stuck. Berries are the soft currency you earn from killing zombies during a single run, Diamonds are the hard currency you bank between runs, and Devil Fruits are the temporary power spikes that make or break your wave clear.
| Resource | Where You Earn It | What It Buys | Resets Per Run? |
|---|---|---|---|
| Berries | Zombie kills, wave completion | In-run upgrades (Health, Damage, Speed) | Yes |
| Diamonds | Boss kills, wave milestones, end-of-run bonus | Permanent fruits, cosmetics, slot unlocks | No |
| Devil Fruits | Random map spawns, special boss drops | One major ability for the rest of the run | Per spawn |
A reliable early loop looks like this: spawn, grab the first Devil Fruit you see even if it is not your main, because every fruit gives you at least one damage ability you can spam. Spend Berries on the Health upgrade between waves 1 and 5, save Diamonds for permanent fruit unlocks rather than cosmetics, and treat boss kills as your Diamond paycheck because the Dune Marauder on Wave 10 pays roughly 320 Diamonds on a solo Corrida Colosseum run according to community data.
Map Spawns and Teleport Rules
The three current maps (Corrida Colosseum, Dawn Island, and Marine Base) each spawn Devil Fruits in fixed zones, and the teleport pads between them have a short cooldown that resets at the top of every wave. The mistake most beginners make is wandering instead of rotating, because a missed teleport window can leave you stuck on the wrong side of the map when the boss spawns.
| Map | Best For | Fruit Density | Boss Location |
|---|---|---|---|
| Corrida Colosseum | Solo Diamond farming, Auto-Skip loops | High (center ring) | Arena floor center |
| Dawn Island | Co-op wave clears, mixed team comps | Medium (forest paths) | Shoreline pier |
| Marine Base | Late-game practice, harder boss patterns | Low (spread across bays) | Hangar roof |
If you are running solo and want pure Diamond income, Corrida Colosseum wins every time because the short loop and Auto-Skip compatibility let you reset the moment the Dune Marauder dies. If you queue with a co-op team, Dawn Island gives the best map control because the chokepoints give your team space to revive and regroup between waves, which lines up with the co-op roles covered in the Fruit Zombie Survival multiplayer guide.
Choosing Your First Devil Fruit and Build Path
Your first fruit defines your run, because every other choice (upgrades, positioning, boss strategy) is filtered through what your fruit actually does. There are 20 Devil Fruits in the game, but only a handful are beginner-friendly enough to recommend on a first or second run, and the rest reward experienced players who already understand the wave economy.
Beginner-Friendly Fruits and What They Unlock
If you are still learning the ability binds and the upgrade shop timing, pick a fruit that gives you survivability and clear damage windows rather than something flashy with long cooldowns. Fruits like the Fire Fist and the Rubber style options let you stay in the fight longer, which means more Berries and fewer wasted revives.
| Fruit | Primary Ability | Best For | Learning Curve |
|---|---|---|---|
| Fire Fist | V-spam melee burst | Solo Diamond farming | Low |
| Rubber | Stretch-punch reach | Co-op wave clear | Low |
| Smoke | AoE crowd control | Map control on Dawn Island | Medium |
| Light | Long-range stun | Late-game boss armor break | High |
| Dark | Pull + burst | High-skill solo pushing | High |
The pattern veteran players follow is simple: stay on Fire Fist or Rubber until you can reliably clear Wave 10 solo, then start experimenting with Smoke and Light once you understand boss attack windows. The 20-fruit roster is wide, but mastering two or three is what actually moves your progression because you stop wasting Berries on bad ability uses.
Berry-to-Diamond Conversion and When to Cash Out
The Berry economy inside a run and the Diamond economy between runs are not the same system, and players who confuse them end up buying the wrong upgrades at the wrong time. During a run, Berries are for survival (Health, Speed, Damage). Between runs, Diamonds are for permanent unlocks and slot expansions.
| Situation | Spend Berries On | Save Diamonds For |
|---|---|---|
| Early waves (1-5) | Health upgrade | Nothing, bank Diamonds |
| Mid waves (6-10) | Damage upgrade | Permanent fruit slot unlock |
| Late waves (11+) | Speed if boss kiting needed | Cosmetic only if everything unlocked |
| After boss kill | Nothing, prep for next wave | Reset and re-run for Diamonds |
Community reports shared on Pro Game Guides confirm that the developer has not yet launched a codes system, so Diamonds cannot be boosted with promo codes at the moment, which makes the per-run farming loop your only reliable income source. Treat every run as a Diamond run and your upgrade pace will accelerate within two or three sessions.
Combat Tactics for Every Wave Range
Once your binds and build are set, the run becomes a series of wave windows where the right tactic shifts. Trying to use the same strategy on Wave 3 and Wave 15 is the most common reason players hit a wall, because zombie density, boss spawn timing, and ability cooldowns all change as waves escalate.
Waves 1 to 10: Building the Foundation
The opening stretch is about getting your Berries flowing and learning ability timing, not about pushing the boss as fast as possible. If you sprint for the boss on Wave 3, you will burn cooldowns, die, and lose the Diamond payout that would have come from a clean Wave 10 clear.
| Wave | Main Threat | Recommended Tactic | Upgrade Priority |
|---|---|---|---|
| 1-3 | Basic zombies | Spam Fire Fist (V), grab fruit | Health |
| 4-6 | Mixed horde, ranged zombies | Use Dash (Q) to reposition | Damage |
| 7-9 | Tanks spawn, density rises | Kite in circles, save cooldowns for elites | Health (second tier) |
| 10 | Dune Marauder boss | Burst during his leap recovery, reset after kill | Speed (if kiting needed) |
The Wave 10 boss is your first big checkpoint. A clean solo kill on the Dune Marauder in Corrida Colosseum with Auto-Skip turned on nets about 320 Diamonds and resets your run in roughly 60 seconds, which is the engine that funds your permanent unlocks. If you are still learning the boss pattern, queue co-op so the Dune Marauder goes down faster and your team can share the Diamond payout, which lines up with the wave-by-wave approach in the Fruit Zombie Survival wave farming guide.
Waves 11 to 20+: Where Late-Game Patterns Change
Past Wave 10, the game shifts from learning mechanics to executing them under pressure. Zombies gain more health, special boss variants start replacing the Dune Marauder, and a single missed Dash usually means a full party wipe because the revive cooldown is longer than the boss's enrage timer.
| Wave | Threat Shift | Tactic Adjustment |
|---|---|---|
| 11-13 | Mixed elites + ranged spam | Save Dash for elites, do not burn it on trash |
| 14-16 | First armored boss variant | Break armor with Light or Dark fruit, then burst |
| 17-19 | Zombie Captain waves with charge attacks | Pre-aim Dash toward the Captain, not away from the horde |
| 20+ | Multiple boss patterns, enrage timers | Rotate map, reset cooldowns between pulls |
The single biggest late-game mistake is treating every wave the same as the opener. Players who try to spam Fire Fist into an armored boss at Wave 15 will run out of cooldowns before the boss phases, which is why experienced players run a co-op composition with at least one Light or Dark fruit holder dedicated to armor break. If you are still solo, the safest late-game pick is staying on Corrida Colosseum and resetting at the boss kill, banking Diamonds and practicing the next wave bracket in short bursts.
Progression Secrets and Diamond Farming Loops
The reason most players plateau around Wave 12 is that they run the game like a single endless session instead of a series of short, profitable loops. Veteran players treat the first 10 waves as a Diamond farm, not a "real run," because the per-hour income from clean Wave 10 resets is significantly higher than grinding deep into waves they cannot reliably clear.
The Corrida Colosseum Solo Loop
The most consistent Diamond income in the game right now is the Corrida Colosseum solo loop, and the steps are specific enough to copy directly. The loop takes about 60 seconds per run, which works out to roughly 19,000 Diamonds per hour when executed cleanly, based on community testing documented by All Things How.
| Step | Action | Time Spent |
|---|---|---|
| 1 | Set party size to 1 from the lobby | 5 seconds |
| 2 | Toggle Auto-Skip in the top-right corner | 2 seconds |
| 3 | Spam Fire Fist (V) through waves 1-9 | 35 seconds |
| 4 | Buy Health upgrade during the Wave 9 to 10 countdown | 5 seconds |
| 5 | Burst the Dune Marauder on Wave 10 during his leap recovery | 10 seconds |
| 6 | Reset character immediately after the boss dies | 3 seconds |
The key detail most players miss is resetting the character the moment the Dune Marauder dies, because every extra second in the post-wave screen is lost Diamond time. The second detail is the Health upgrade timing: buying it between Wave 9 and Wave 10 gives you the buffer to survive the boss's opening combo without burning your Dash on the first hit.
Hidden Tricks Veteran Players Use
A few small habits separate the Wave 20 regulars from the Wave 10 crowd, and most of them are easy to copy once you know they exist. None of these require rare fruits or high-level unlocks, just better timing and positioning.
| Trick | What It Does | When to Use It |
|---|---|---|
| Pre-aim Dash | Hold the Dash direction before the boss telegraphs | Every boss above Wave 10 |
| Wave-skip during revive | Auto-Skip lets a revived teammate catch up | Co-op runs after a wipe |
| Fruit reroll by leaving | Exit to lobby to force a new fruit spawn | When you get a fruit you cannot use |
| Map edge kiting | Run circles around the map edge on Dawn Island | Solo Wave 12+ survival |
| Diamond bank before reset | Confirm Diamond payout screen before resetting | Every solo loop end |
The fruit reroll trick is especially useful because there is currently no codes system to compensate for bad RNG, so the only way to control your fruit pull is to leave the lobby and re-enter. The Diamond bank confirmation is a habit that sounds obvious but is missed by roughly 30 percent of new players according to community reports, which means they are losing payout data on a percentage of their runs.
Frequently Asked Questions
What is the fastest way to clear the Dune Marauder boss on Wave 10?
The fastest solo clear is to spam Fire Fist (V) during the boss's leap recovery window, use Dash (Q) to avoid the slam, and finish the kill before the enrage timer starts. On Corrida Colosseum with Auto-Skip on, a clean kill takes about 10 seconds and pays roughly 320 Diamonds.
How do I get Diamonds fast as a new player in Fruit Zombie Survival?
Run the Corrida Colosseum solo loop: party size 1, Auto-Skip enabled, spam Fire Fist, buy Health between waves 9 and 10, reset right after the Dune Marauder dies. A clean loop pays about 320 Diamonds per minute, which is roughly 19,000 Diamonds per hour based on community testing.
Are there any working codes for Fruit Zombie Survival?
No, the developer has not yet launched a codes system, and community trackers like Pro Game Guides confirm there are no active codes to redeem. Your only Diamond source right now is in-run farming, so focus on the Wave 10 boss loop and the upgrade timing between waves.
Can I play Fruit Zombie Survival with friends?
Yes, the game supports co-op for up to 4 friends, and co-op runs are the best way to push past Wave 15 because you can share revives and split boss damage. Running a balanced team with at least one armor-break fruit like Light or Dark makes the late-game boss patterns much more forgiving.
What should I do after I die in a run?
After a death, you can either spend 12 R$ to revive in the same run or reset back to the lobby to start a fresh Diamond farm. If you are below Wave 10, reset and re-enter the loop because the revive cost is higher than the Diamonds you will earn from the rest of that run.